X2 User Manual

Note: This manual is a work in progress, as firmware updates add features or modify behaviour. We appreciate your patience, if you have specific questions please email: support@aon2.co.uk.

  1. Technical Specifications
  2. Getting Started
    1. Charging
    2. Basic Operation
    3. Removing device from the arm mount
    4. Getting the app
    5. Connect to your smartphone
  3. App
  4. Device Modes
    1. Skydiving Modes
      1. Skydive Mode
      2. Wingsuit Mode
      3. Canopy Mode
  5. Firmware Updates
  6. Troubleshooting
  7. Advanced Features

Technical Specifications

  • Operating altitude: 0 to 33,000ft (0m to 11000m)
    • absolute pressure range: 1260-260 hPa
  • High resolution sunlight readable colour display (2.7″)
    • 400×240, active area 59x35mm
  • Backlight for low light or night jumps
  • Bluetooth Low Energy 5.0
  • Battery capacity: 750 mAh
    • typical battery life*: ~4 days @6 jumps per day, 10% reserve capacity
  • Charging: micro-USB
  • Feet or metres
  • Full IPX7 waterproof rating
  • Sensors:
    • barometer
    • ambient light sensor
    • 6-axis motion sensor
    • magnetic compass
  • GPS
    • Ground speed, track
    • Range and heading to landing area, jump run offset
    • Glide ratio
  • GPS log upload to Android/iOS and web app
  • Detailed jump logging with wireless upload to Android/iOS
    • Exit altitude
    • Freefall time
    • Opening altitude
  • Dimensions: 77.36 x 55.12 x 13.11 mm (3.04 x 2.17 x 0.5″)

*battery life depends on GPS usage, backlight and other functions being used.

Getting Started

Getting Started

Charging

Please charge the device for 1 hour before first use. To charge the device, plug it in to a USB charger with the included micro-USB cable. A red light will indicate that the device is charging. A green light will indicate that charging is complete.

If the charging LED shows yellow, this indicates the battery is not charging. If this occurs please contact support via email at support@aon2.co.uk.

To switch on the device, press the middle button.

Basic Operation

  • top button
  • middle button
  • bottom button

The middle button acts as the power button. To power on the X2, press the middle button. The middle button also acts as the “OK” button when navigating the menus. The top and bottom buttons act as the “up” and “down” buttons for selecting menu items.

Removing device from the mount

Find the “open” side of the mount and lift the device up slightly


then slide the X2 out of the mount

If this fails, find a lever such as a credit card or thin screwdriver:

raise the clip with a lever, then slide the X2 out of the mount

Jumping with the X2

At the very start of a jump day, we highly recommend the following steps:

  1. Go outside with a clear view of the sky, and turn on the X2. Navigate to the GPS menu
  2. The X2 should get a GPS signal within 5 minutes. If this does not happen, turn off the X2 and switch it on again.
  3. Once a GPS fix has been obtained, this will make getting a GPS signal much faster for the next several hours.
  4. Start jumping!

App

Getting the App

Please select your platform below.


Connecting through Bluetooth

Make sure that the device is in the “Bluetooth” menu in the settings when connecting via bluetooth.

Open the app and click “Connect to a device”. (Note: do NOT use the Android bluetooth menu to connect, connect from the X2 app)

When connecting a device for the first time, a passkey will be generated and displayed on the device screen.

Enter this passkey on the phone prompt to complete the connection.

Setting Waypoints

There are 2 ways to set a waypoint on the X2. First method is through the phone app.

To set a waypoint, use your phone to connect to the X2. Under the waypoints tile map, tap on a location to set down a pin:

To Label the waypoint, LONG PRESS on the waypoint row and the name entry window will appear:

Second method is through the device. First, ensure that you are outdoors with a clear view of the sky. Using the buttons, navigate to the GPS menu on the device:

By selecting “Set here” the current waypoint is set to your current location. This is also saved as “User Waypoint” on the device memory. A good GPS signal is required for this function to work.

Troubleshooting Bluetooth

If there are problems with Bluetooth functionality, please disconnect from the X2, go into your phone settings -> Bluetooth and “FORGET” the X2 device and re-do the pairing process.

Device Modes

Device Modes

Standby Screen

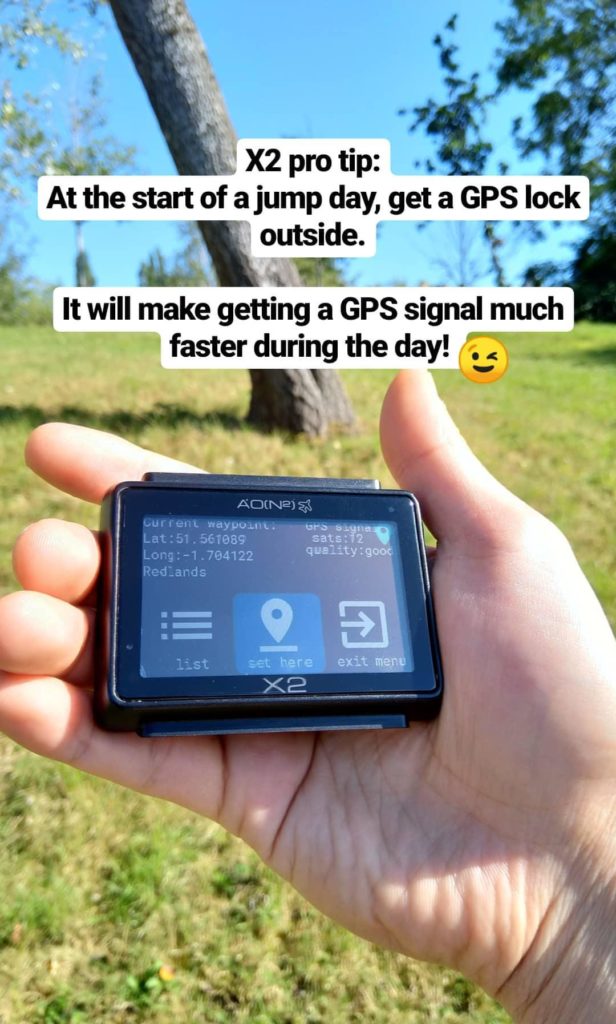
The standby screen is what the device shows in low-power mode. In this screen, the X2 will have several days of battery life. The X2 will turn on its GPS once every hour to check for a GPS signal, so that transitioning to an action mode will enable it to get a GPS lock within a few seconds. From a cold start, the GPS may take up to 2 minutes to obtain a signal.

Keep the X2 in the standby screen when going for a skydive – it will automatically detect when in a climb (exceeding 230 ft/min) and change to plane mode if the skydiving mode or wingsuiting modes are selected.

Sport Modes

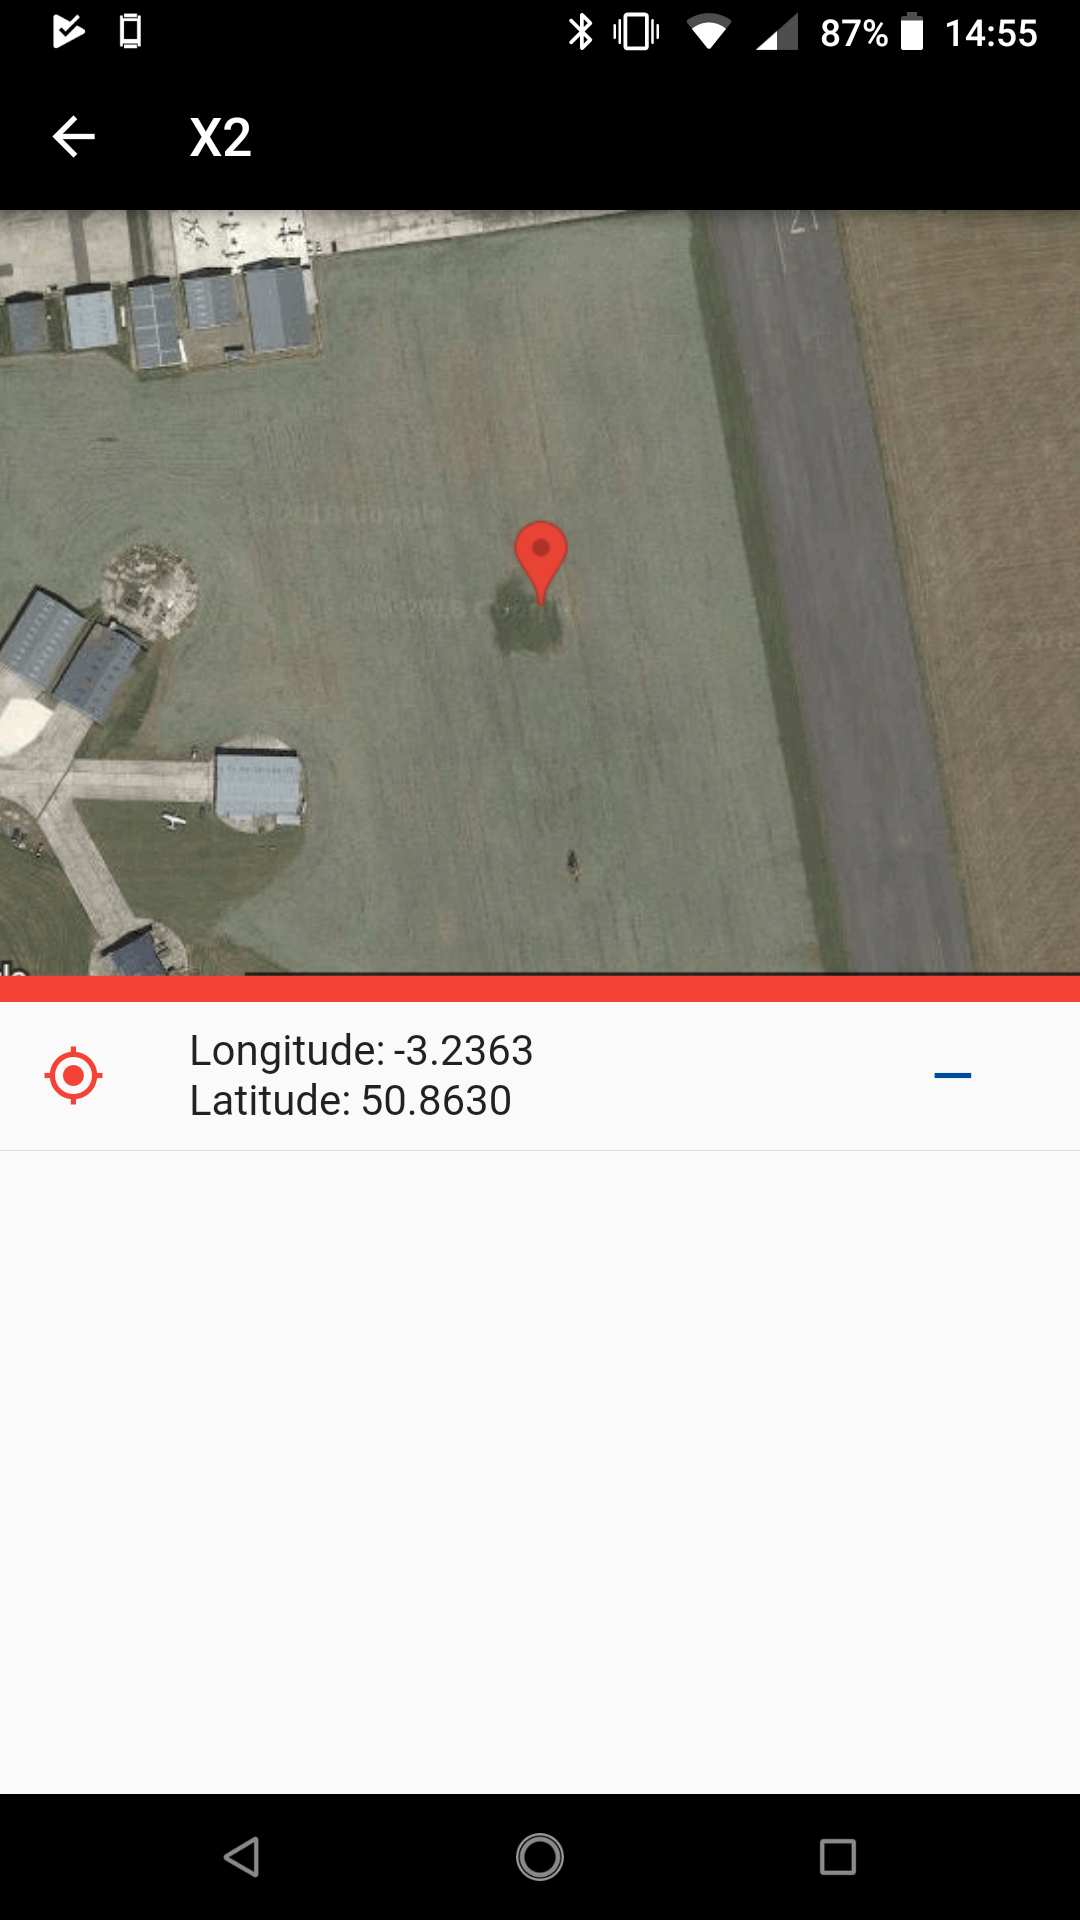
Going to the menu “modes” screen you can select the sport mode you wish to use.

A tick mark (✓) can appear next to either skydive or wingsuit mode. When skydive mode or wingsuit mode is selected with a tick mark (✓) , automatic climb detection is activated.

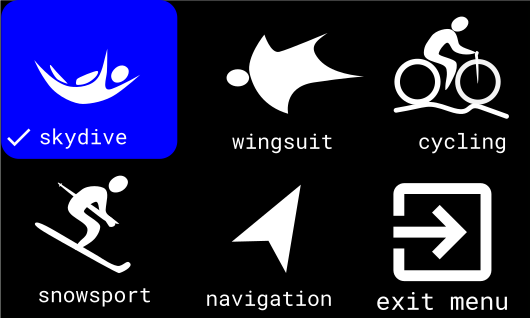
Selecting any of the other modes starts it immediately. Additional functionality and features will be released via firmware updates.

Skydiving Modes

Plane Mode

If “skydive” or “wingsuit” mode is selected in the mode menu, then the device will automatically switch to plane mode if sufficient climb rate is detected (230 feet per minute).

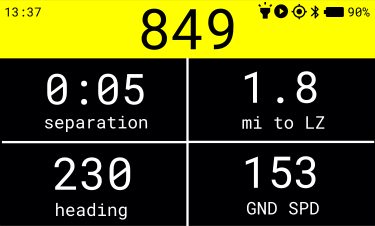
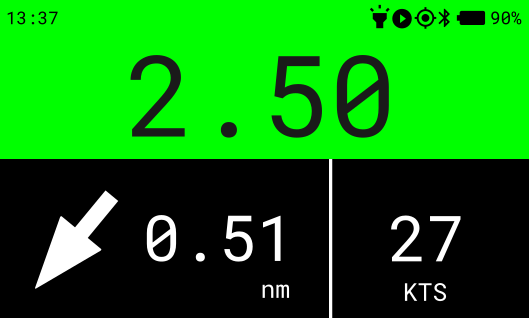
Plane mode will display distance to waypoint and ground speed in the units the user has selected, and true heading in degrees. There is also a 5-second separation timer to help assist exit separation. This timer will be customisable in future firmware updates.

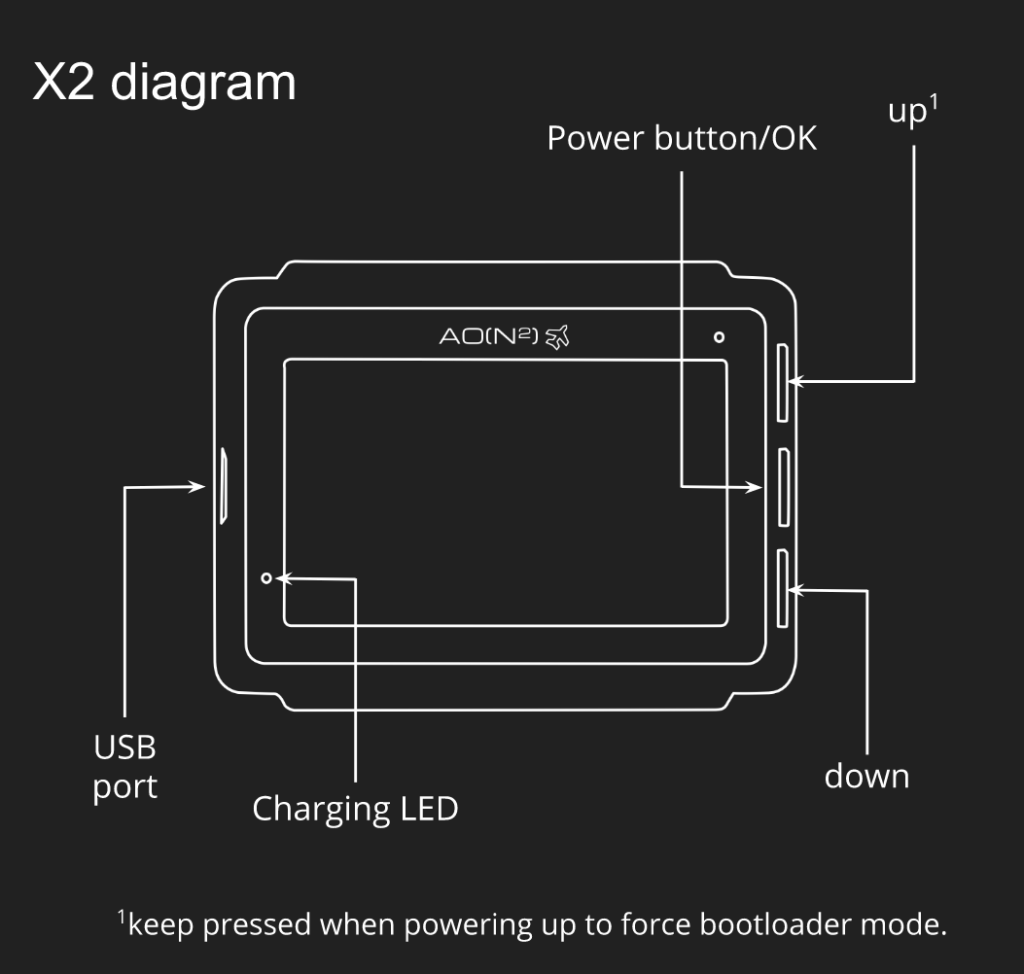
If plane mode is entered accidentally (for example, driving uphill above the threshold speed), you can force a return to standby mode by pressing both TOP and BOTTOM buttons at the same time.
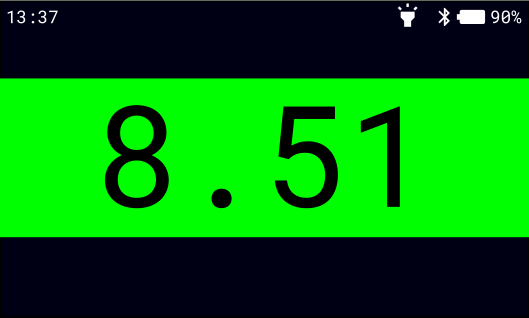
Skydive Mode

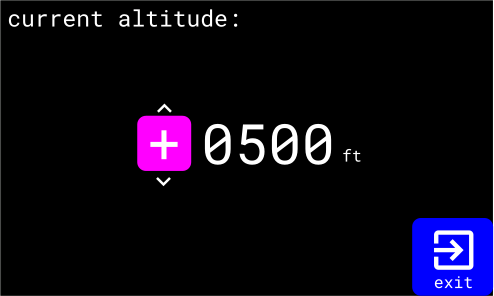
In skydive mode, during freefall the screen only displays the altitude with colour code. If the altitude is over 1000 (feet or metres), then it will display the altitude in 1000’s.
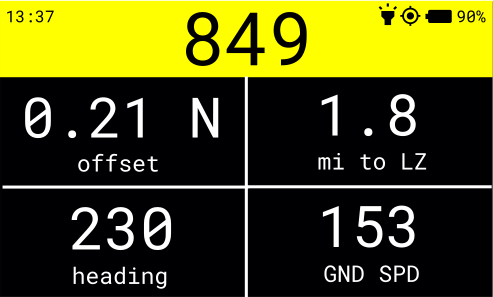
Wingsuit Mode

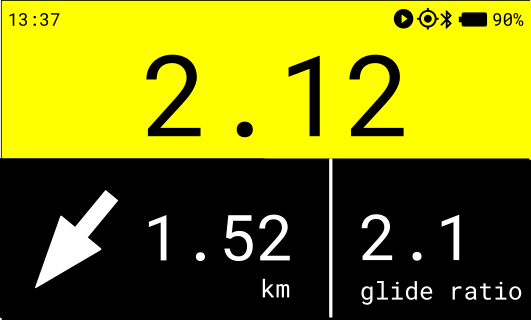
Choose wingsuit mode if you would like to get additional information during freefall such as distance and direction to landing area and glide ratio.

Canopy Mode

The device will automatically switch to canopy mode when it detects canopy deployment. At the moment it displays altitude, direction and distance to landing area, and ground speed. Customisation of this screen will be enabled via firmware updates.

Firmware Updates

The X2 was designed to be updated after release, so we can add more features, fix bugs, and improve performance of the device. There are 2 possible ways to update the firmware: wired, and wireless.

We have released the wired version of the firmware update first, as it is more reliable and easier to develop. To use this method, you need a PC or laptop with macOS or Windows 10.

Windows 10 Driver Installation (only required for first time)

For Windows 10, first, we need to install drivers for the X2 bootloader. You only need to do this ONCE – once the drivers are installed, you can download all X2 updates later on without doing this step.

Please go to our Downloads page and download the X2 bootloader driver. Unzip the driver, and double-click X2Driver-setup.exe.

Reboot your computer.

Linux

For running the firmware updates on linux, we recommend debian or ubuntu-based systems. For the first update, please run the setup script first (will prompt for root privileges).

Reboot your computer.

Firmware update

Download the update utility for your platform: www.aon2.co.uk/downloads

Turn on your X2, and navigate to the main menu:

Then, plug it into the computer’s USB port.

Uncompress and start the firmware update utility.

In Windows, double-click X2FirmwareUpdate.exe:

It will show the detected X2s. Click on the X2 in the list, then click “Update”, then start the update. A progress bar from 0% to 100% should appear while it is updating. The X2 will automatically reboot once the firmware update is complete. If it hangs, or exits with an error, please email support@aon2.co.uk for tech support.

Troubleshooting

Exiting Plane Mode

If for some reason, plane mode is accidentally activated (for example in a car) or the altimeter stays in plane mode (for example, aborting a jump and landing with the aircraft), press the TOP+BOTTOM buttons simultaneously. Timing is important – they need to be pressed down at the same time rather than holding one button down and pressing the other. This will return the altimeter to the home screen.

Emergency Reset

In unlikely case the X2 freezes during operation, pressing the middle button for 15 seconds will force it to power off. Pressing the middle button again will restart the device.

Bootloader Mode

In the unlikely case the X2 firmware gets corrupted, power off the X2 using the middle button above (pressing for 15 seconds). Plug the device into a USB port on a computer. Hold down the top button while pressing the middle button, this will start the device into bootloader mode, and a new firmware can then be flashed on to the device.

Advanced Features

Altitude Offset

To add an altitude offset, go to Menu->Settings->Adjust->altitude offset. Enter your starting altitude.

Jump Run Offset

A version of the firmware has been developed to additionally calculate the cross-track error (i.e. jump run offset) from the current velocity vector:

This information is displayed in Plane Mode in place of the separation timer:

In the future this will be a user-selectable option, however if you would like to use this as a beta version, please email support@aon2.co.uk.